Keeping your address details up to date is crucial when it comes to receiving important account-related communication and maintaining compliance with regulatory norms. Whether you’ve shifted to a new residence or simply need to correct an existing address, Samco allows you to update your correspondence or permanent address effortlessly through its Star Back Office platform.
This blog will walk you through the full process of making the necessary changes step by step.
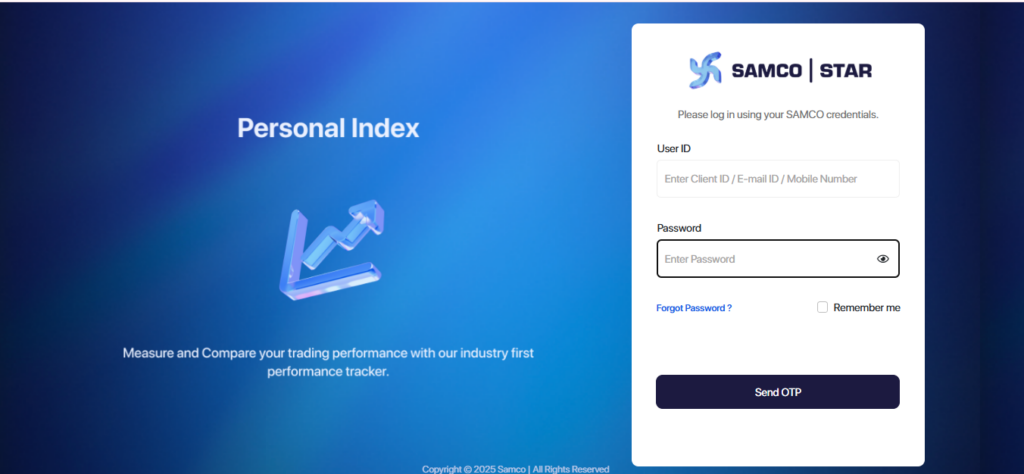
Step 1: Access the Samco Star Back Office
To begin, visit the Samco Star Back Office portal and log in with your Samco credentials
Note: The credentials for the Samco Star Back Office and the Samco Mobile App are different. For Star Back Office, the password can either be your PAN number or the password you have set specifically for the Back Office.
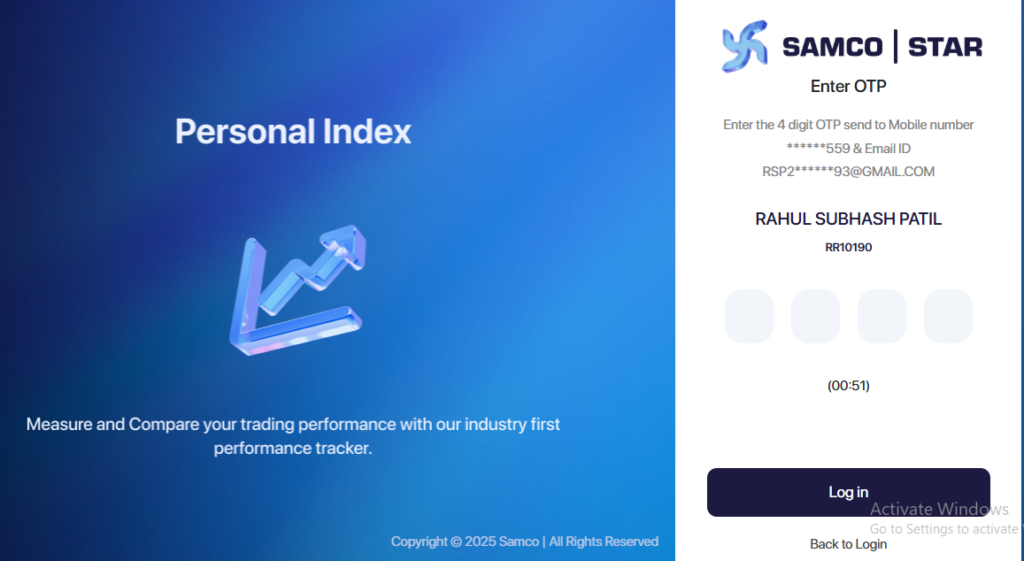
Step 2: Verify with OTP
After entering your login details, click on Send OTP.
You’ll receive a One-Time Password (OTP) on your registered mobile number or email ID.
Enter the OTP
Note: The OTP is valid for 10 minutes, so make sure to enter it promptly
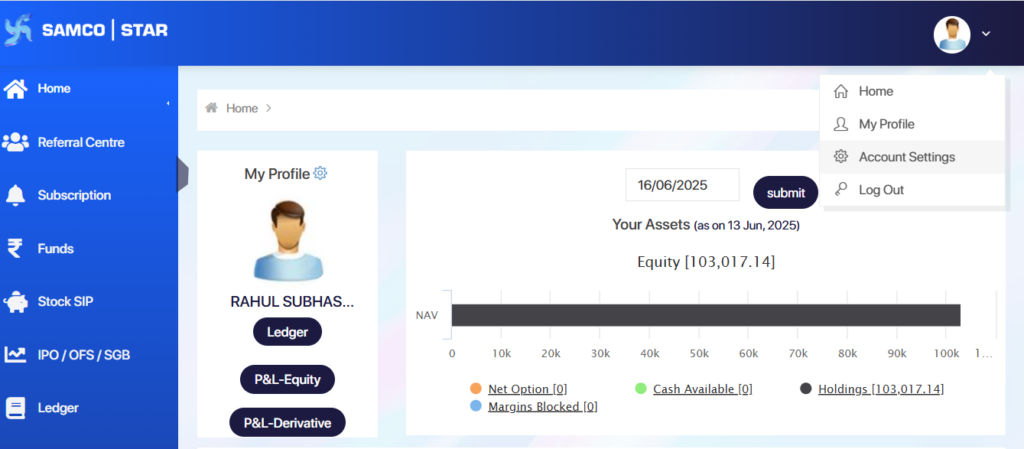
Step 3: Navigate to Account Settings
After logging in, you’ll arrive at your personal dashboard, a secure area where you can manage and update your account settings.
Now that you’re inside the portal:
- Click on your profile name located in the upper right-hand corner.
- From the dropdown, select ‘Account Settings’.
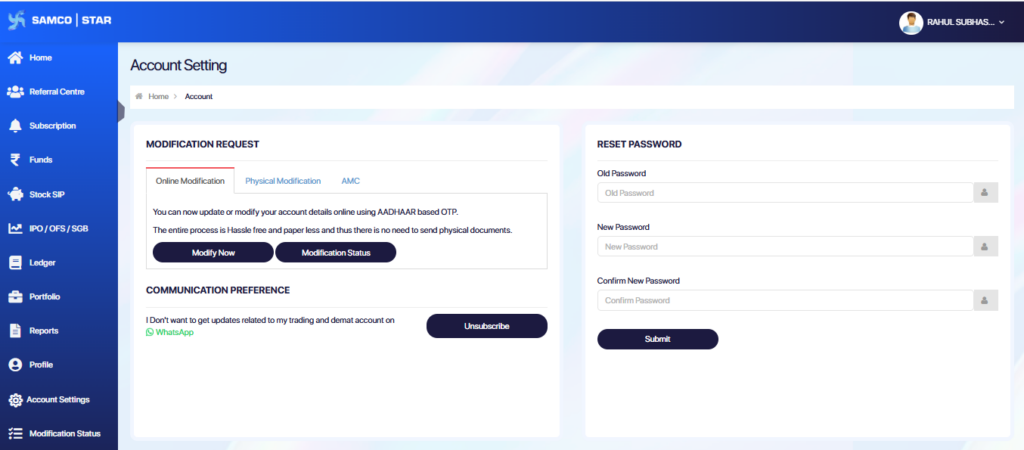
Step 4: Choose the Modification Option
In the Account Settings section:
- Look for the Modify Now button and click on it.
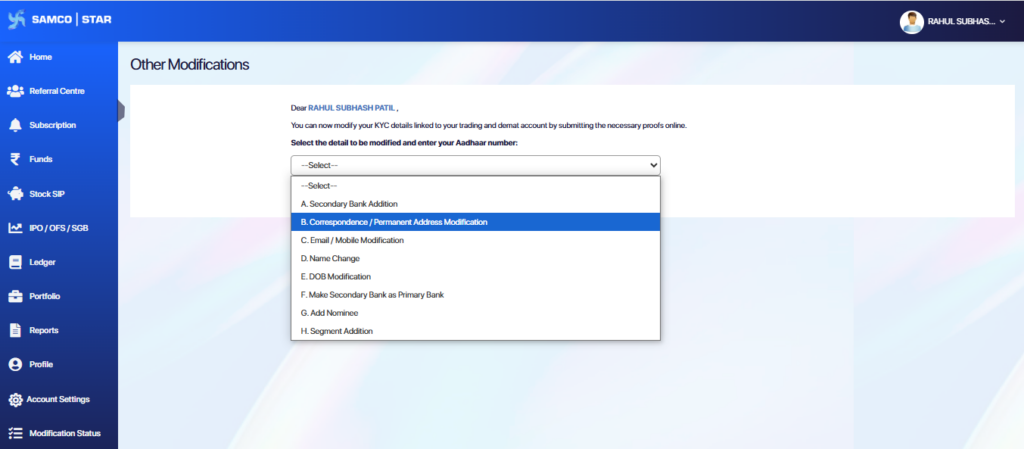
Step 5: Select Correspondence / Permanent Address Modification
In the dropdown list of modification services, click on the option labeled Correspondence / Permanent Address Modification.
This single section allows you to update either your correspondence address, your permanent address, or both, depending on what needs to be changed.
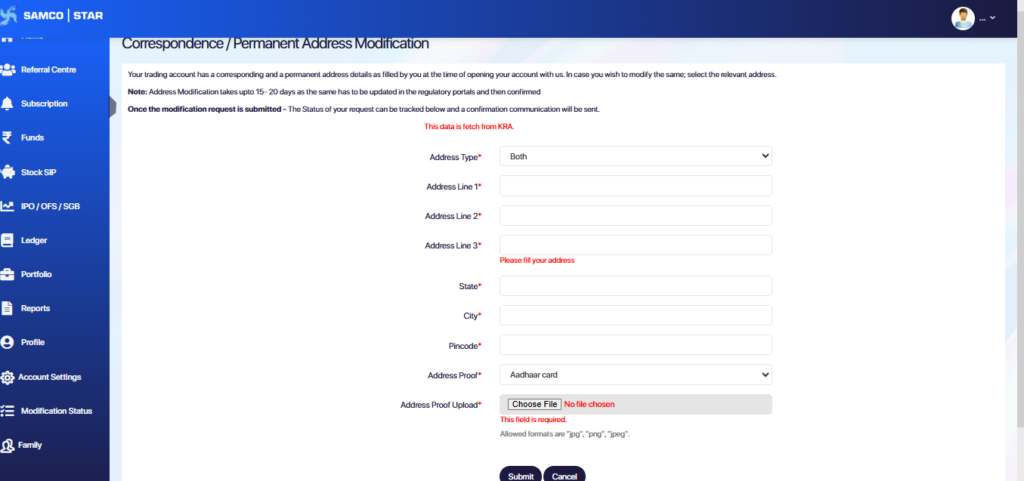
Step 6: Fill in the Address Update Form
Once you’ve selected the Correspondence / Permanent Address Modification option, you’ll be directed to a detailed address update form.
Here, you’ll need to:
- Select the Address Type from the dropdown; choose Correspondence, Permanent, or Both depending on what you’re updating.
- Enter your new address details, broken down into:
- Address Line 1
- Address Line 2
- Address Line 3 (Landmarks or additional info)
- State
- City
- Pincode
Make sure to review the information carefully to ensure there are no spelling errors or incorrect entries.
You’ll also need to upload a valid Address Proof Document such as an Aadhaar Card clearly displaying your name and the new address.
Note: You can upload your documents in any of the following accepted formats: JPEG, PNG, JPG, or PDF.
Step 7: Complete the Payment for Address Modification
After filling in your updated address details and uploading the required proof, click on Submit.
You’ll then be redirected to a secure payment gateway to complete a fee of Rs 200 + GST for the address modification request. This fee is required to initiate the official update across regulatory platforms.
Follow the on-screen instructions to make the payment using your preferred method, such as UPI, Net Banking, Credit/Debit Card, etc.
Note: Make sure the payment is completed successfully, as the modification process will only begin after the transaction is confirmed.
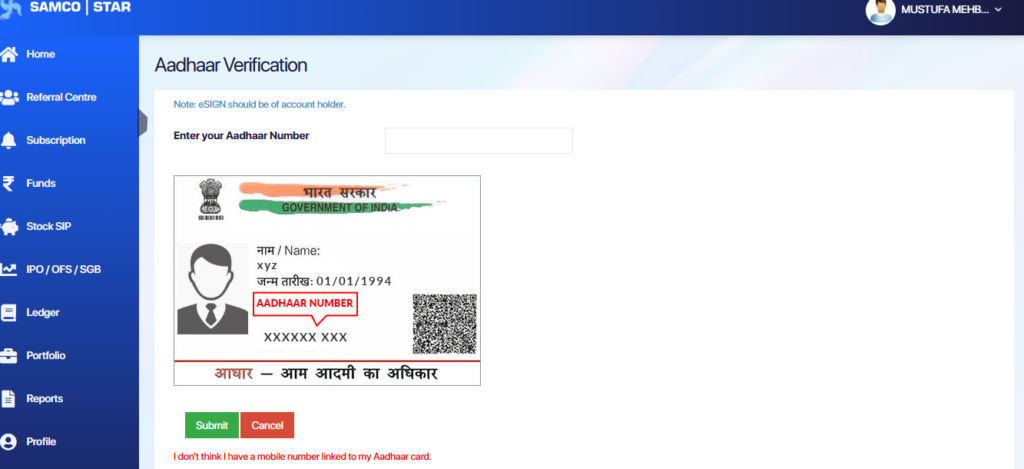
Step 8: E-sign or Aadhaar Verification
After completing the payment for your modification request, you will be redirected to begin the Aadhaar e-sign process.
- Enter your 12-digit Aadhaar Number in the designated box.
- Click on Submit to proceed.
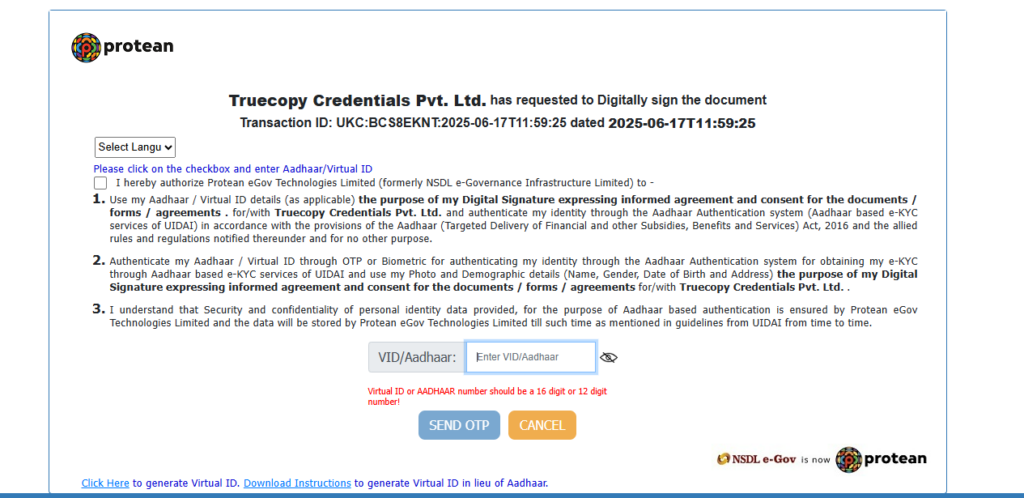
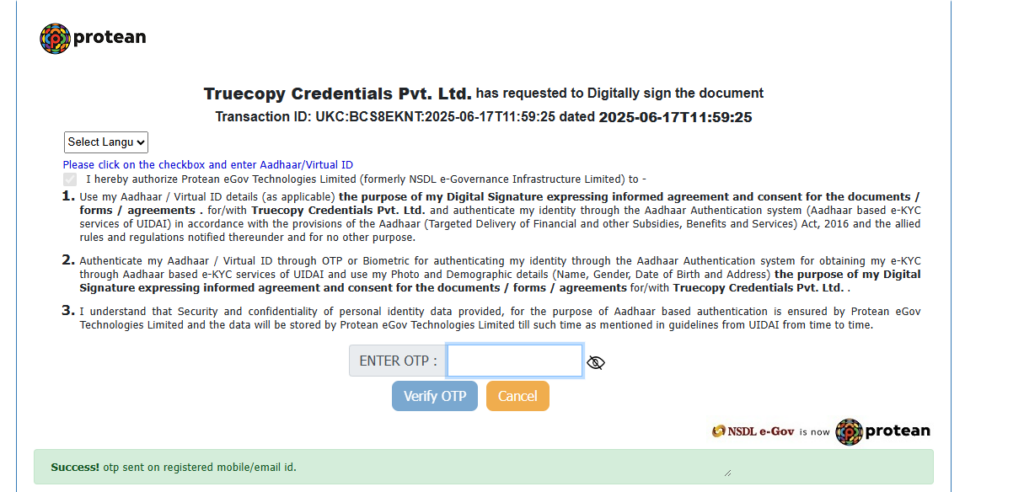
Step 9: Consent and Authentication Page
- You will be redirected to the Truecopy Credentials Pvt. Ltd. e-sign authorization page.
- Read the consent terms carefully.
- Check the box: I hereby authorize.
- Enter your Aadhaar Number or Virtual ID (VID) in the field provided.
- Click on Send OTP.
Note: Ensure your mobile number is linked to your Aadhaar to receive the OTP.
Step 10: Enter OTP to Verify
- You will receive an OTP on your Aadhaar-linked mobile number.
- Enter the OTP in the field labeled ENTER OTP.
- Click on Verify OTP.
Step 11: Track Address Modification Status
After successfully completing the Aadhaar e-Sign, your address modification request will be sent for verification.
- To check the progress, go to the Modification Status section in the Samco Star Back Office.
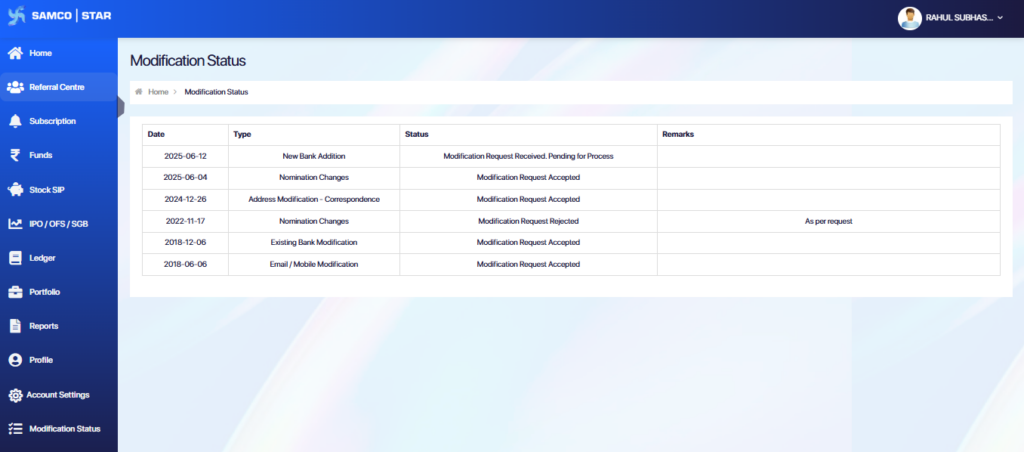
Note: The Turnaround Time (TAT) for modification completion without deficiencies is up to 48 working hours after submitting the request successfully.
 Easy & quick
Leave A Comment?